
SAAB C900 Fuel Level Signal Converter
Background
A common reason why your fuel level gauge on your dash isn’t working is that the sender has quite literally come apart inside the gas tank. This may be due to modern fuel compositions, perhaps ethanol, or maybe simply because they are getting driven less. The oxidized fuel chemistry changes to become more corrosive to the glue holding everything together. Either way, you end up with a bundle of copper wire and some bits floating around in your tank-- and no working fuel gauge. Any veteran c900 owner will also know that the mechanical odometer that gets used is on borrowed time, so don’t be tempted to use it for tracking mileage.
Since the original sender unit has been NLA for quite a long time, I wanted to find some solution to this. I had noticed when doing a fuel pump replacement on my ‘91 that there was an integrated float on the SAAB original pump assembly and on all new pump assemblies from that generation. For model years 1989-1993 900 (+’94 convertible) SAAB had switched over to the 9000 style pump which used a swing-arm style fuel level sender integrated into the return bucket. That design was then used through every SAAB model up until the GM-bodied Sport Sedan. The 900 still did not use this float, but it was probably easier to leave it on for all model assemblies than remove it for only the 900 model. With an actual alternate sender available (and maybe already pre-installed), the next step was to see if it could be integrated into the 900s gauge cluster.
I tested the signal resistance of the sender to see if it could be used as a substitute. They weren’t anywhere close to what the 900 was expecting and in fact, they are inversely proportional. When one sender reads high resistance the tank was empty, and the other sender reads low resistance. A setback for sure, but with inexpensive digital processors being so plentiful I set out to prototype a signal converter to use this integrated sender and be able to once again have a working gauge.
Fast forward, I’ve had the final iteration installed in my 900 since 2018 and it works great. The bonus of having full control of the signal that gets sent to the dash is that you can fix some of the “analog” issues like a non-linear swing range, fuel slosh readings, etc.
Installation

Pump with integrated level sender (thin metal arm with float)
If you don’t know if your pump assembly has ever been changed, one way to check is to check the connector on the top of the fuel pump through the access panel under the trunk floor (see below for instructions). If the connector has a 4-pin to 2-pin adapter, then it has the sender and the wires are just open. To verify the float is operational and installed, you can check the resistance between the two thinner wires (Black/white). Resistance should be between 30 and 400 Ohms with the connector unplugged.
If you don’t have an updated assembly with working float, you’ll need one. SAAB #5328653 or any aftermarket equivalent should be purchased and installed.
After you’ve verified you have the right parts let’s continue.
To gain access to the pump assembly and wiring, remove the false floor in the trunk. This is being demonstrated on a 3-door hatchback, but the 4-door sedan should be almost identical. Once your trunk has been cleared and the parcel shelf removed, remove the two Torx screws securing the floor. Once fasteners are removed, open the spare tire area and then slide the whole floor towards you which should unclip from the body underneath. From there you can simply remove the panel.

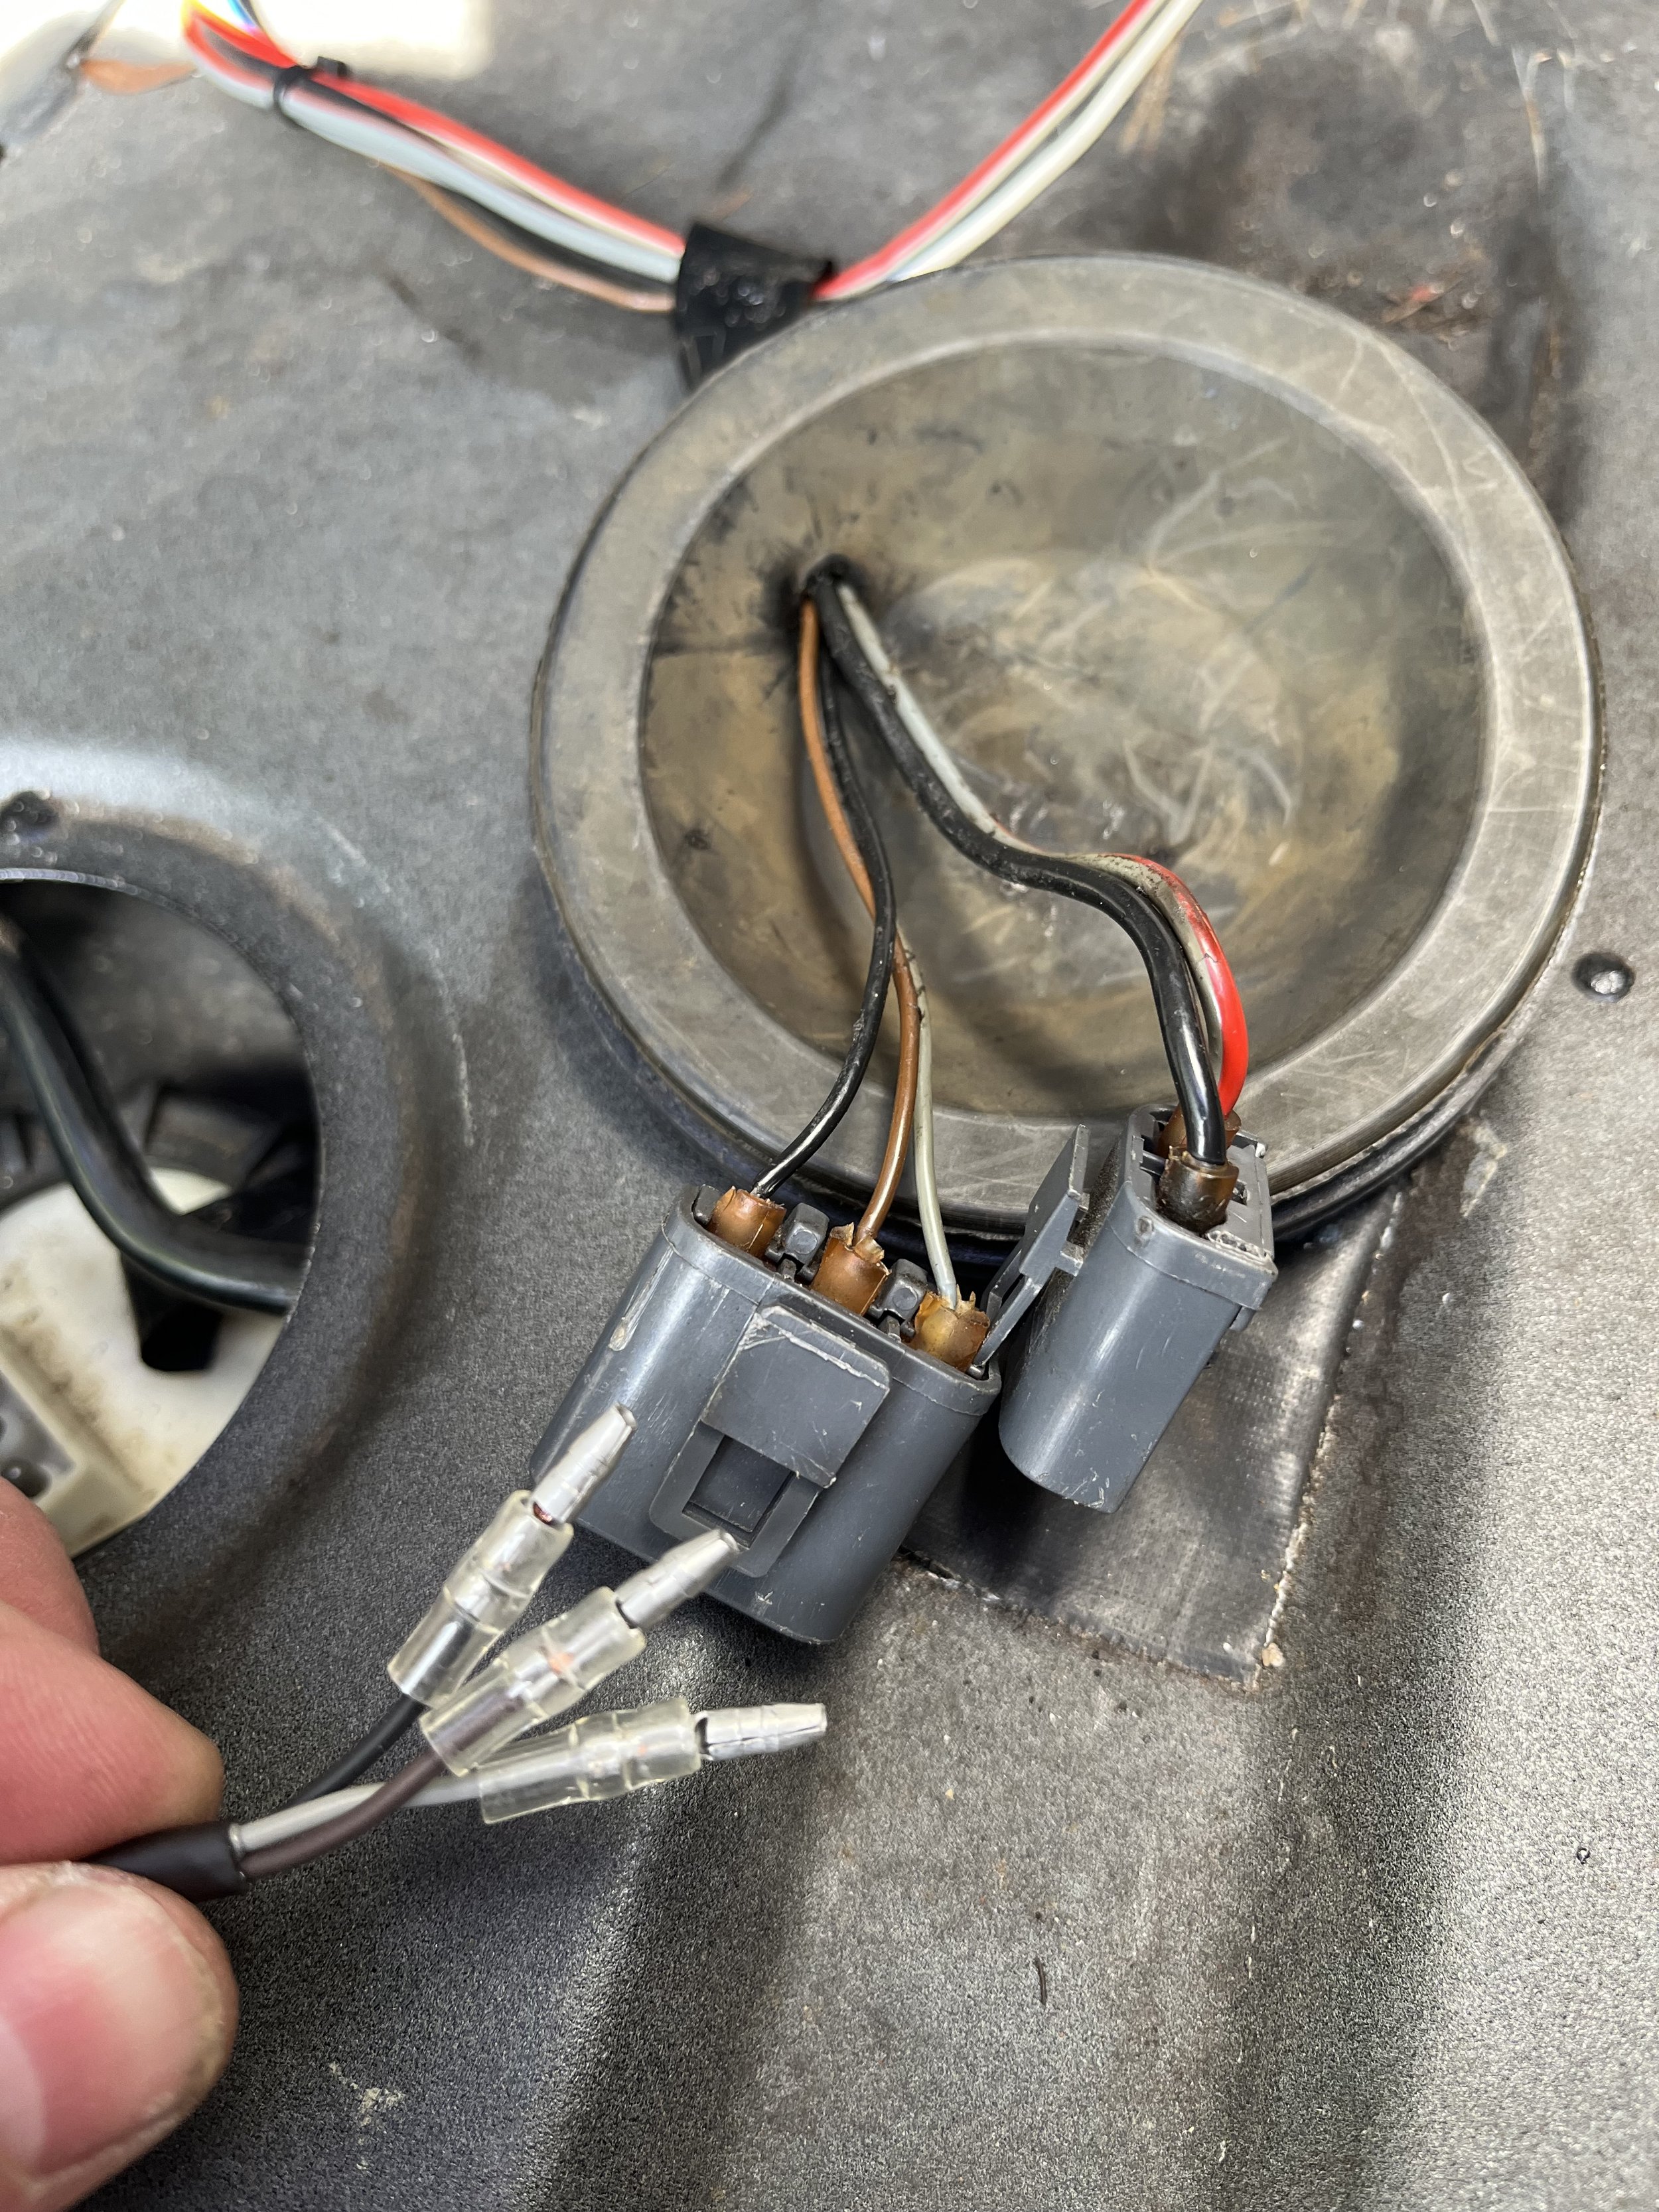
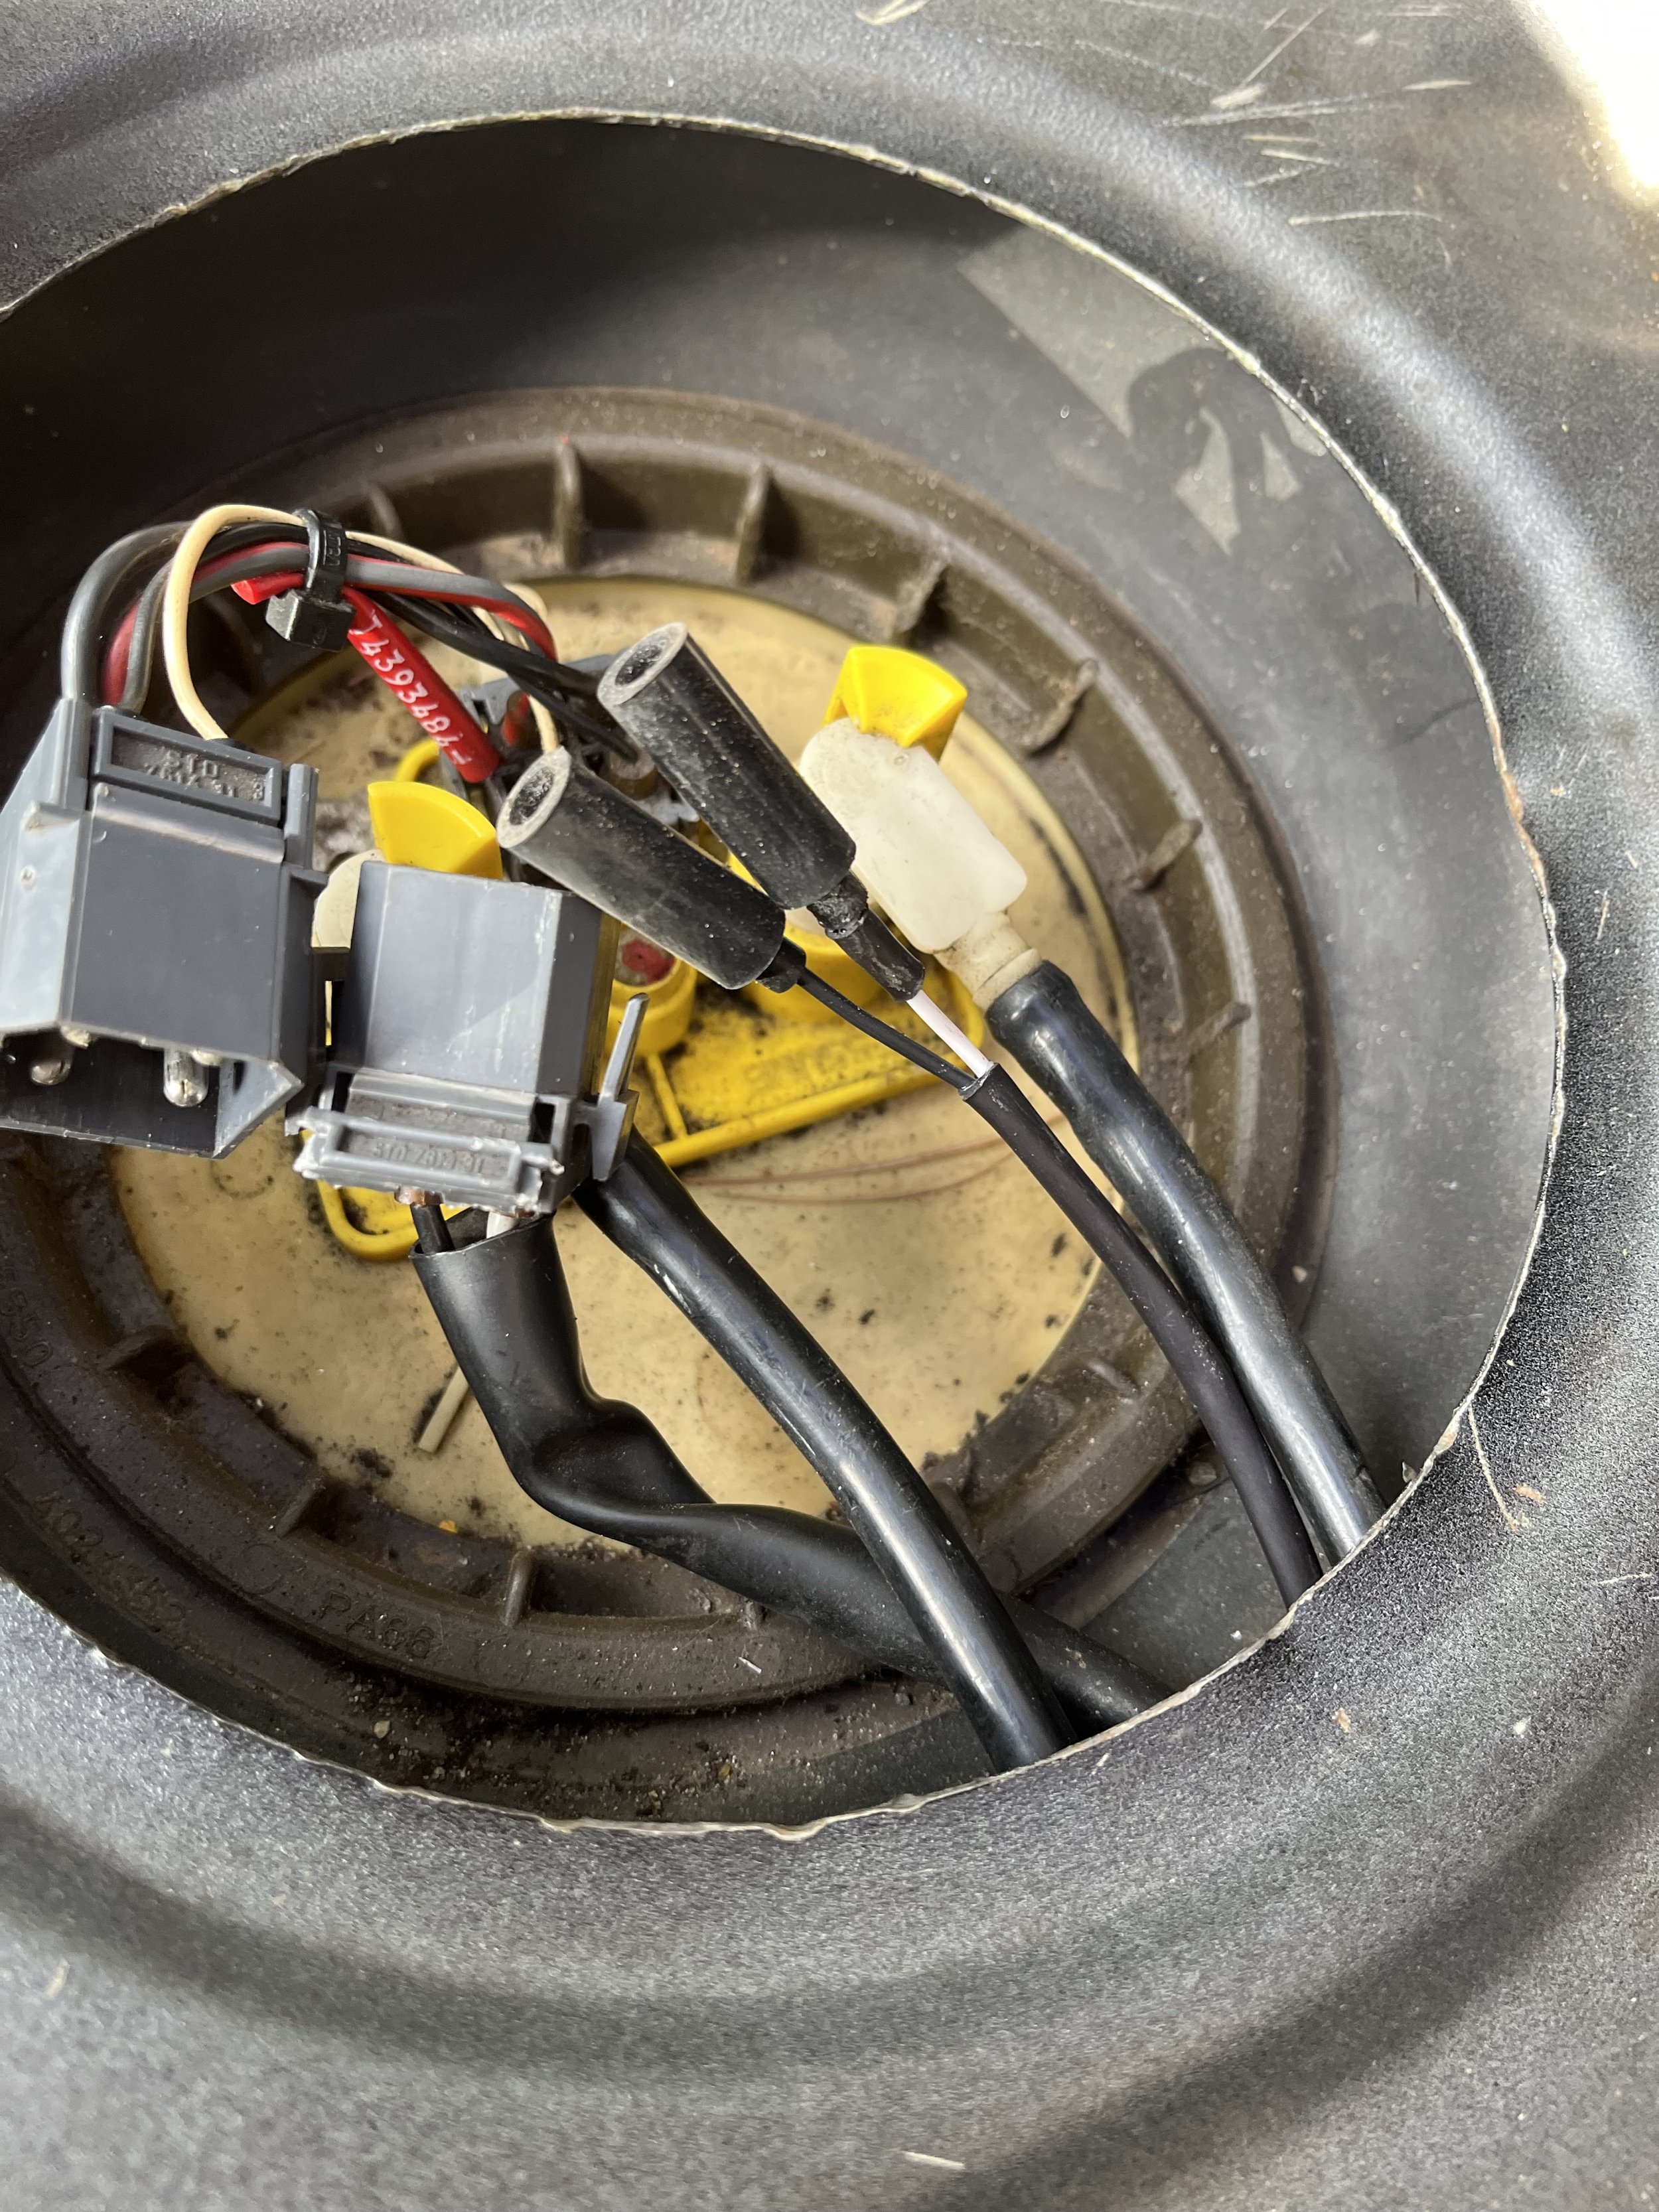
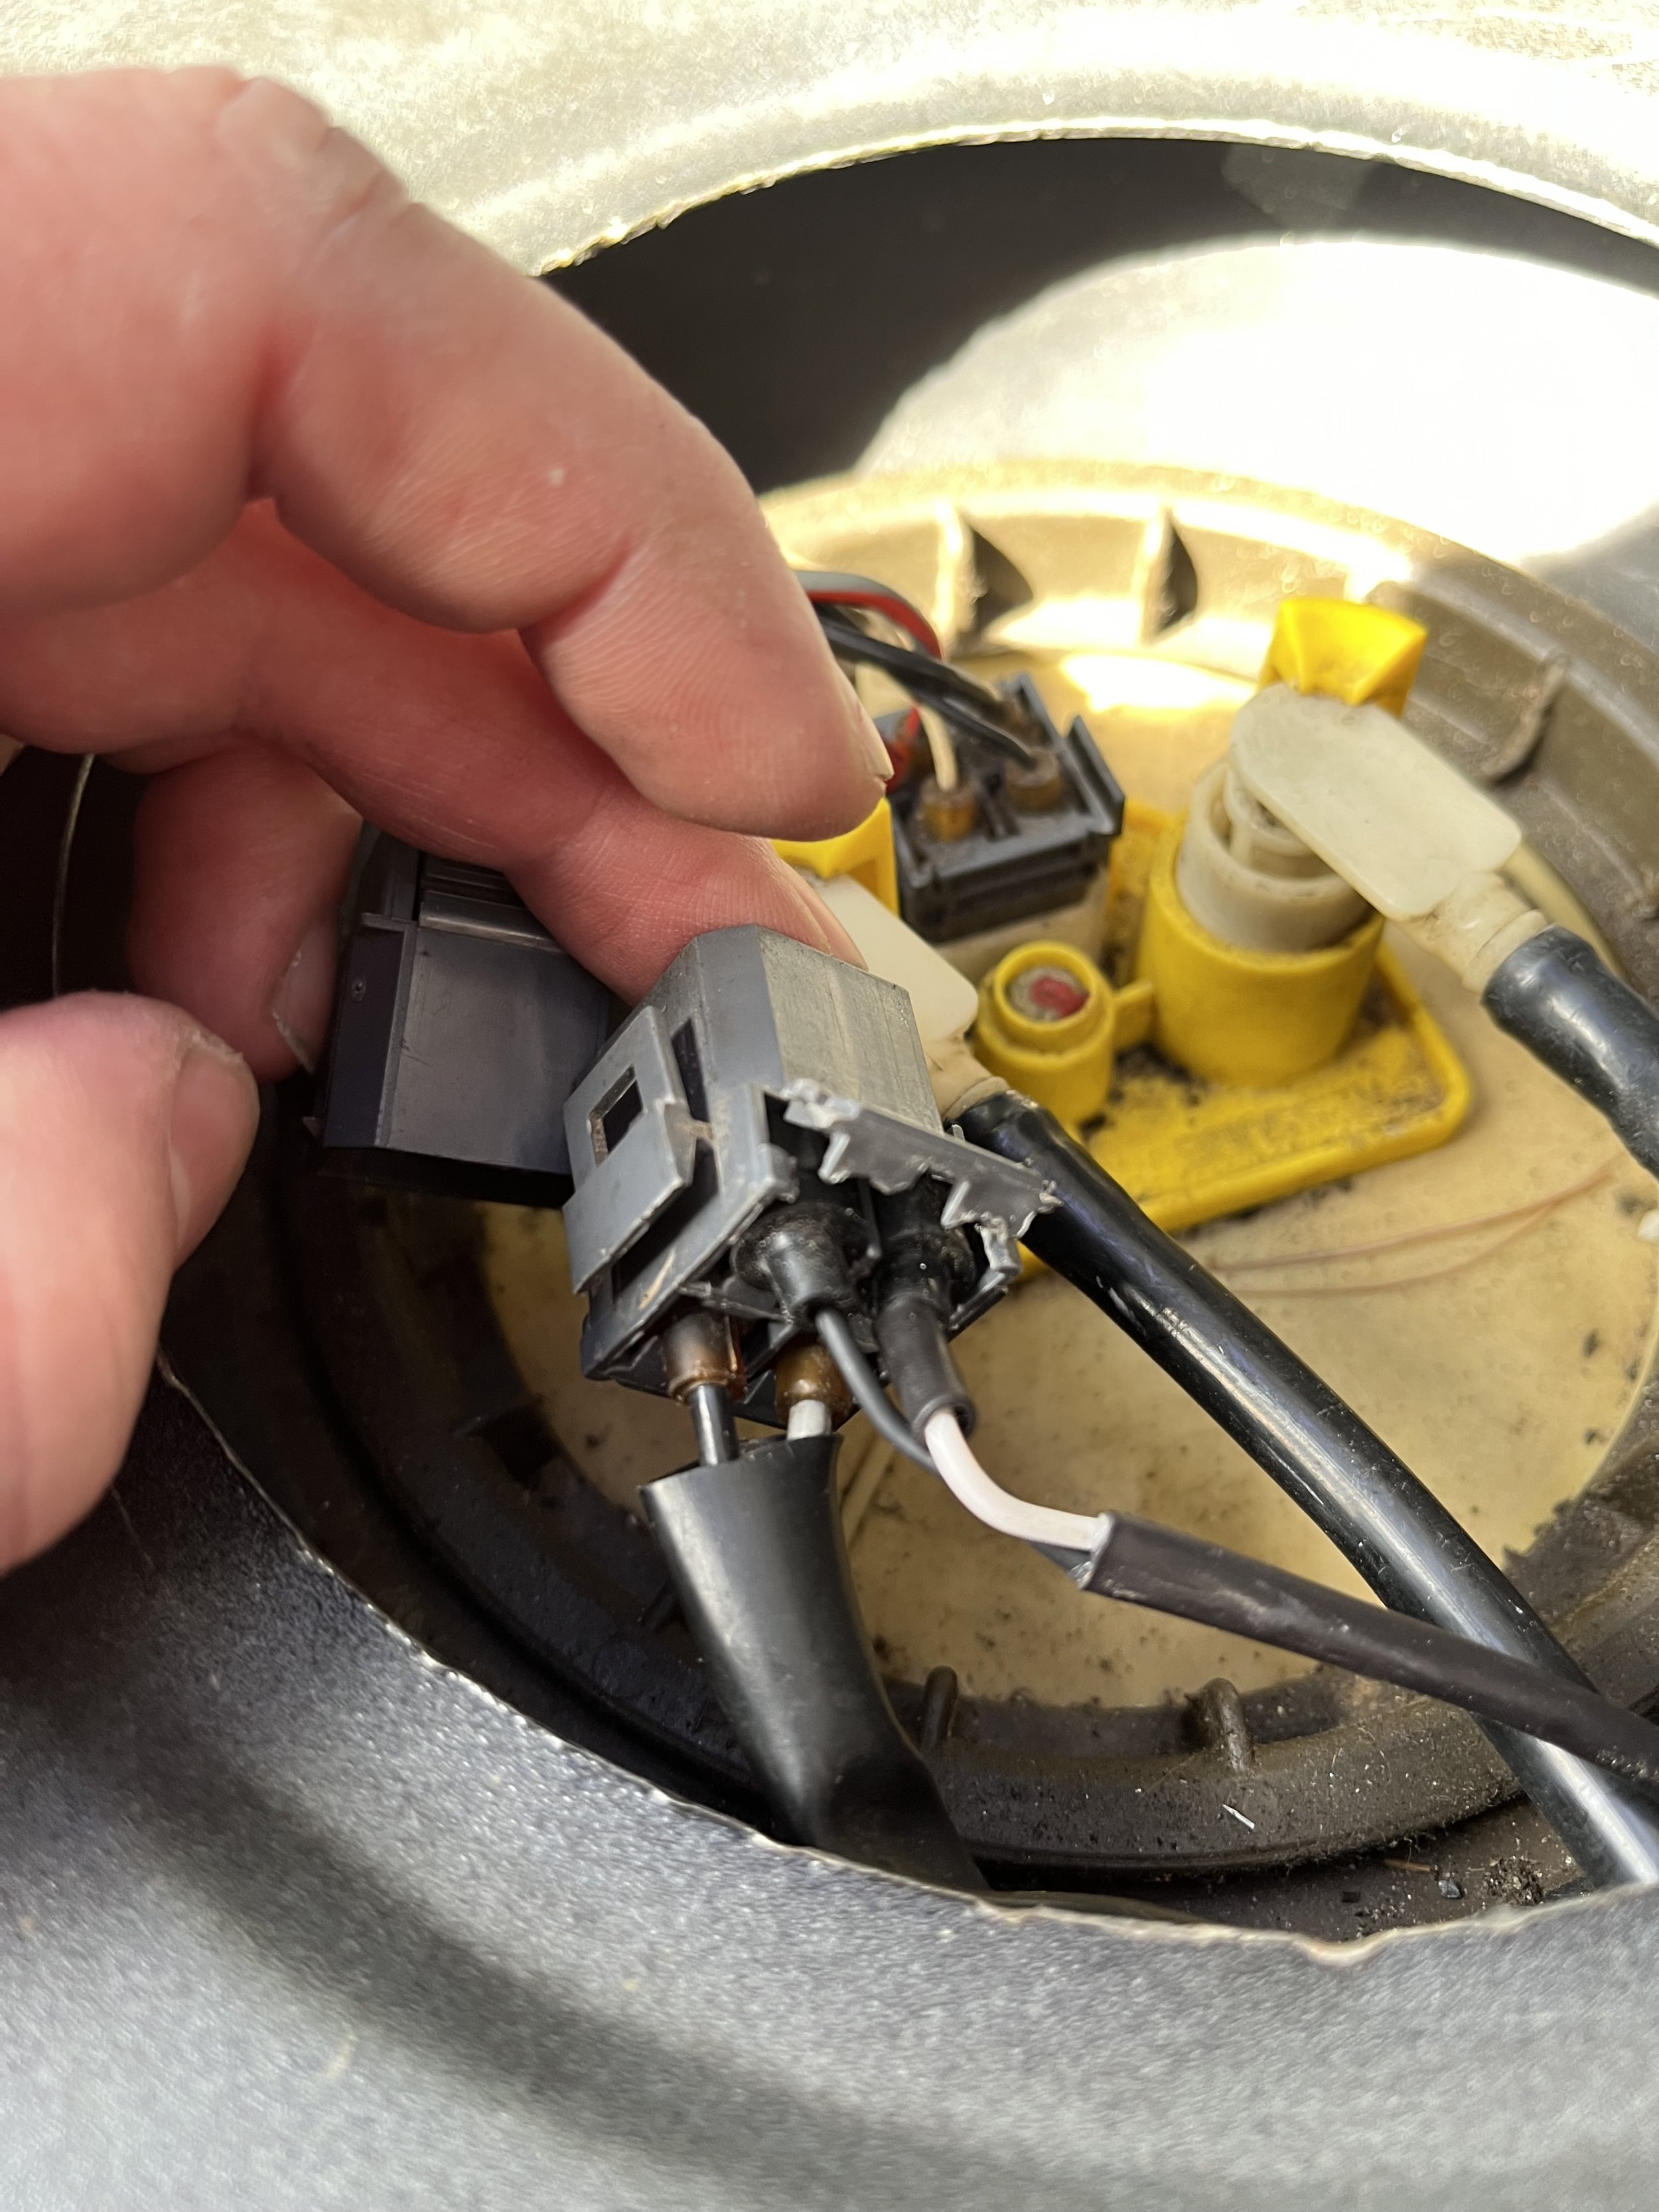
You now can see two access ports to the tank; Pull /pry these out. The fuel pump is under the larger opening on the left and the fuel level sender is on the right. First, disconnect the 3-wire plug that goes to the in-tank sender (remove sender rubber plug cover). The old sender can stay in the tank.
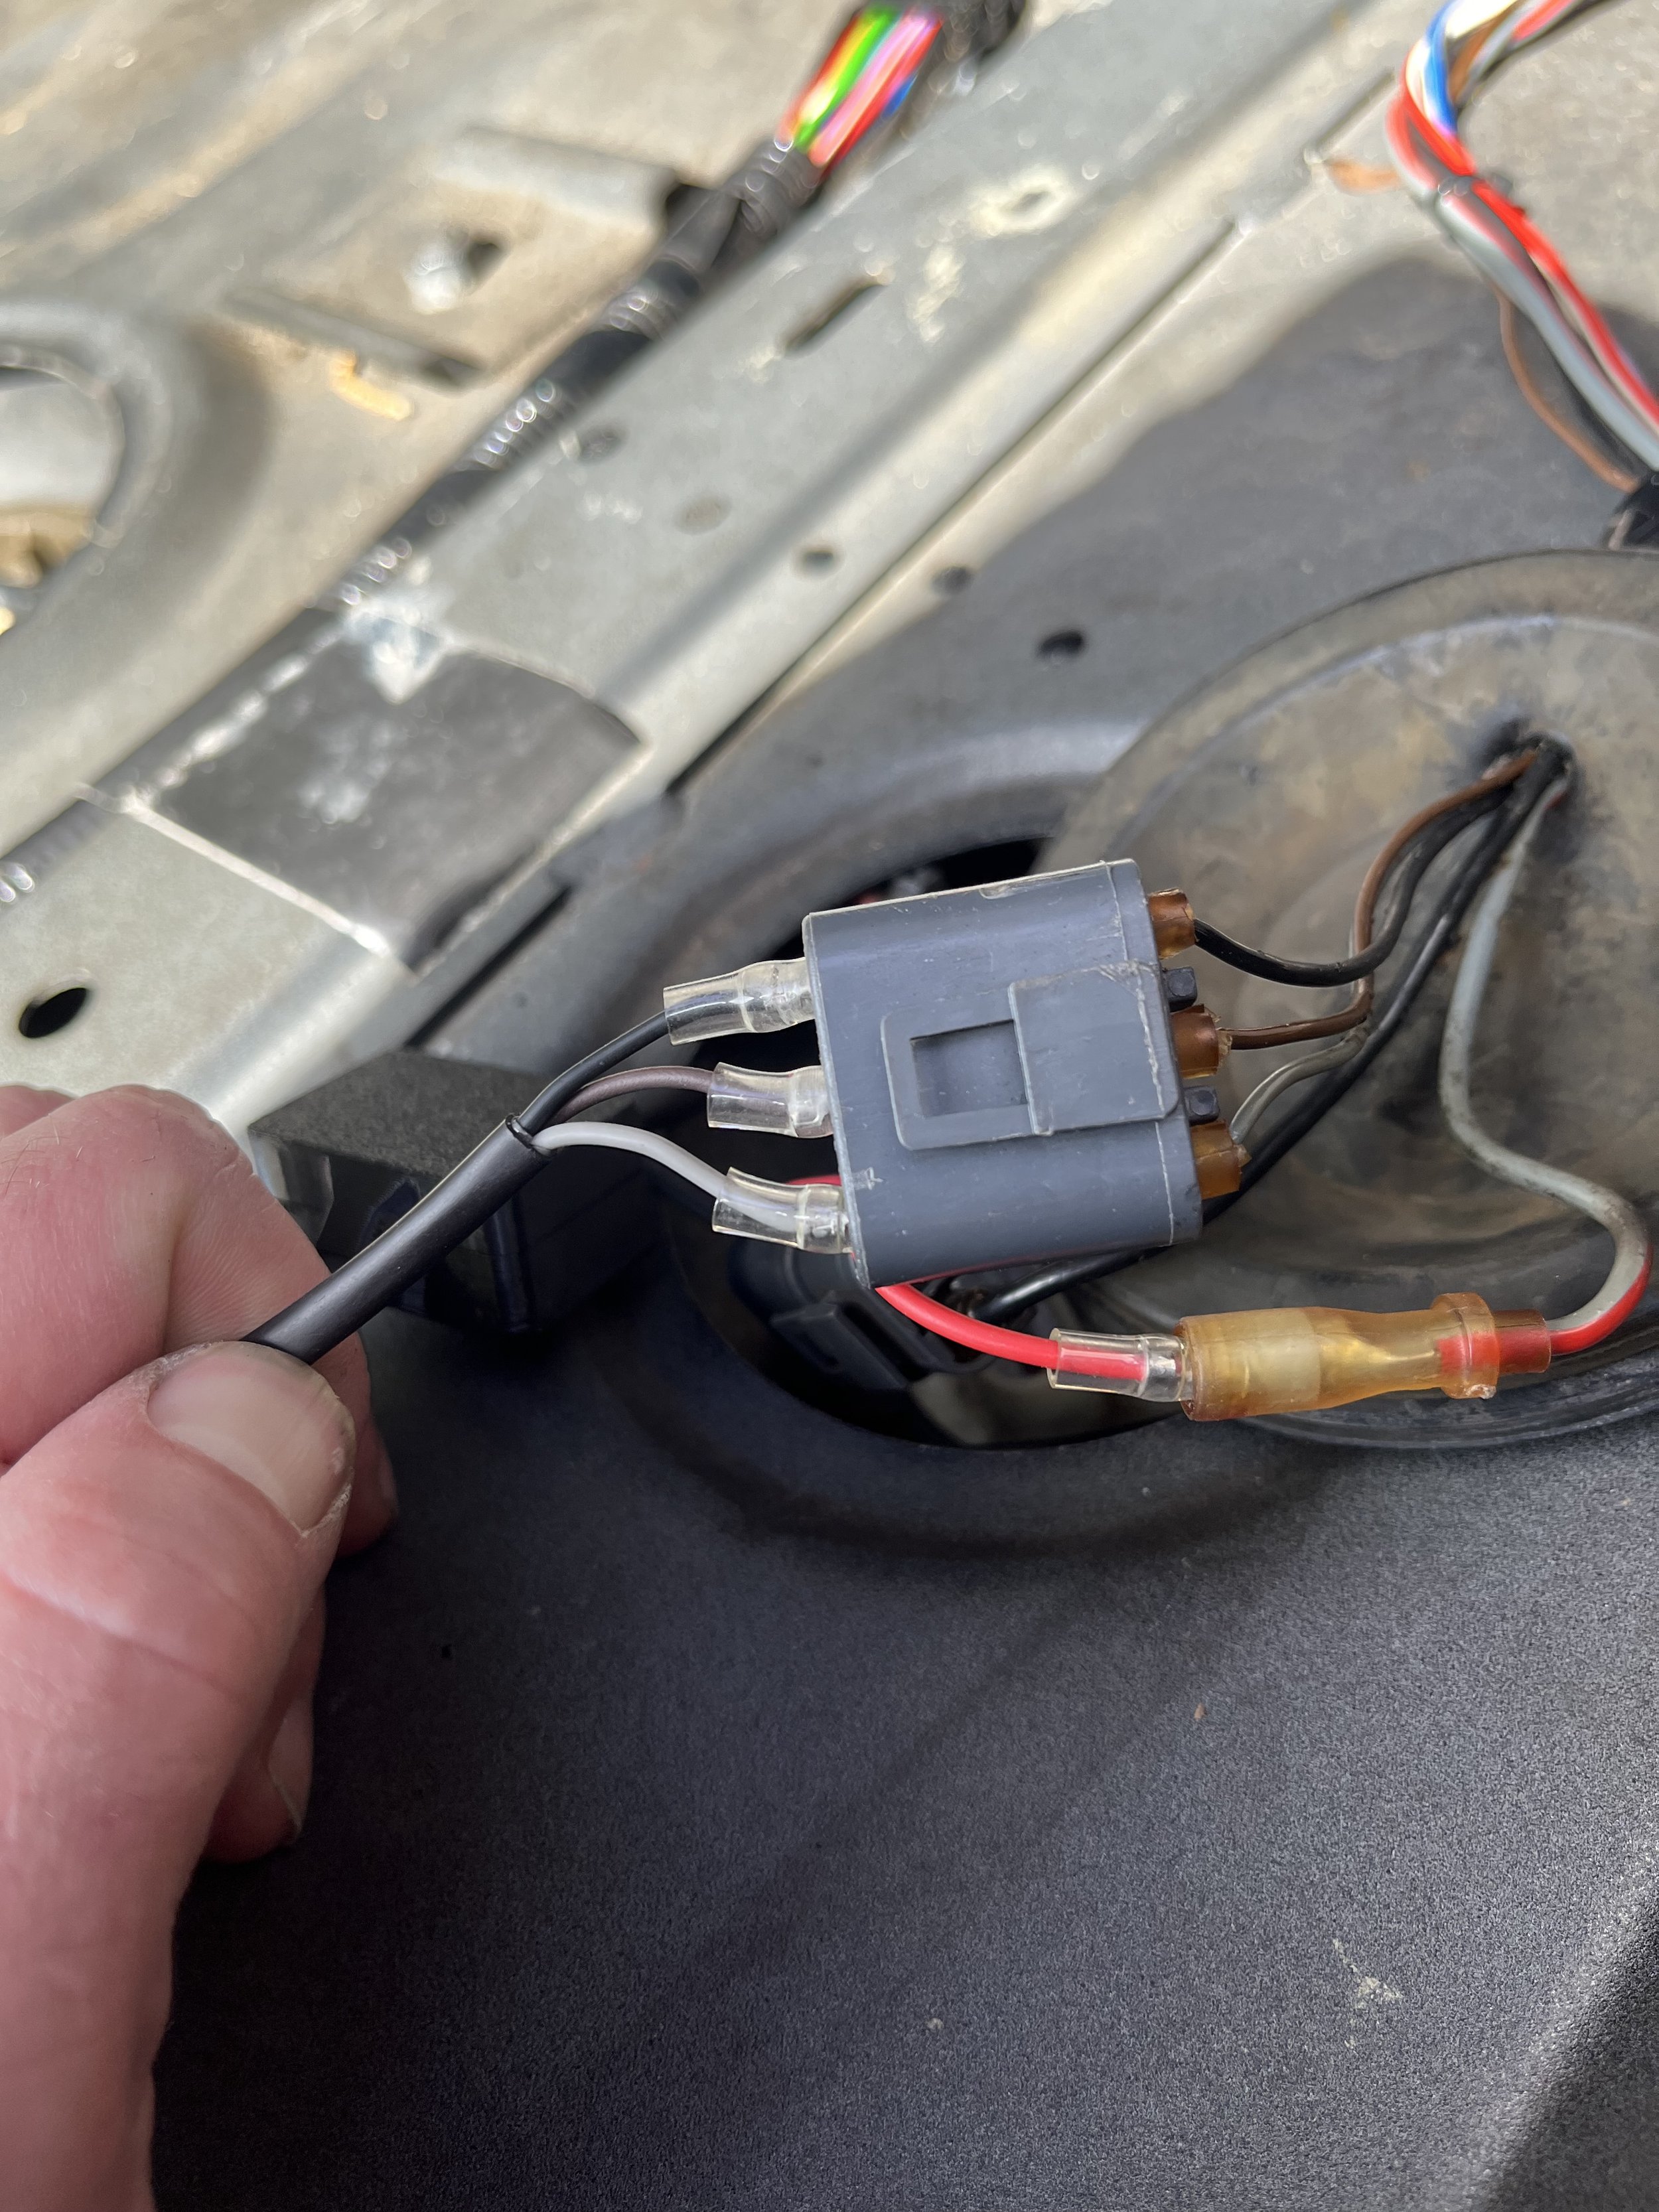
Connect the brown, gray, and black wires to the corresponding brown, gray, and black wires of the MCS signal converter. The device will live under this cover.
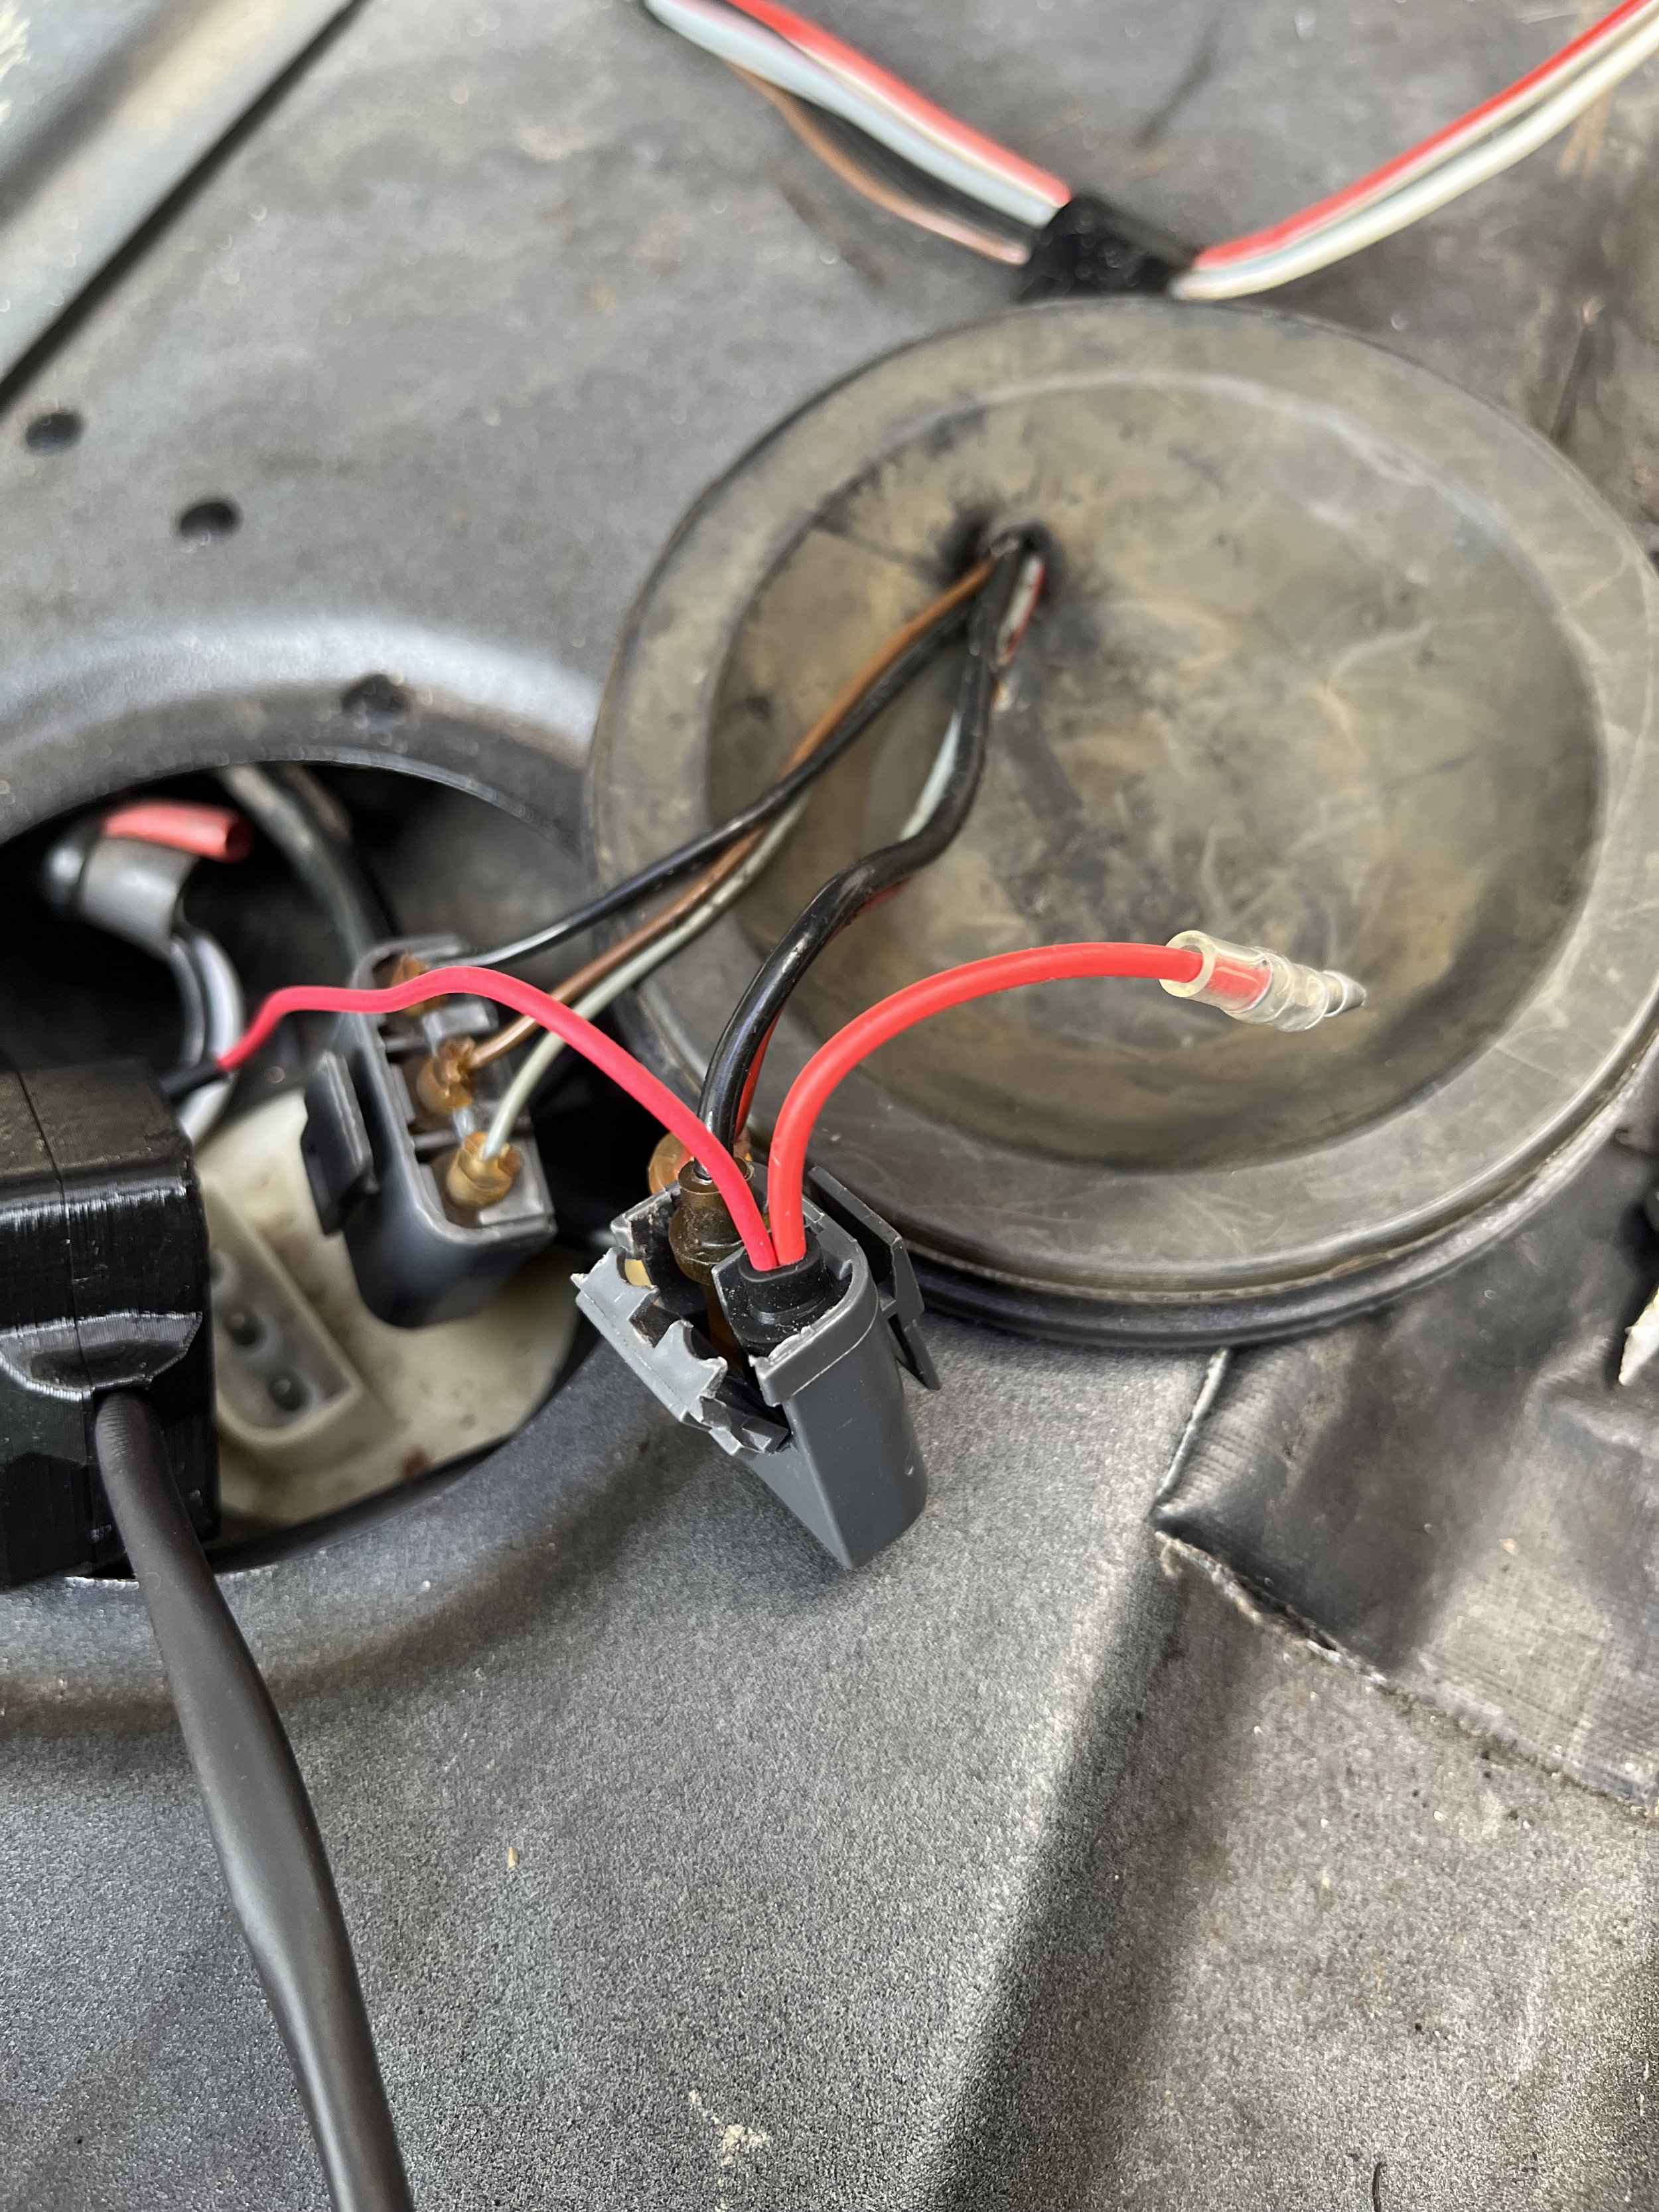
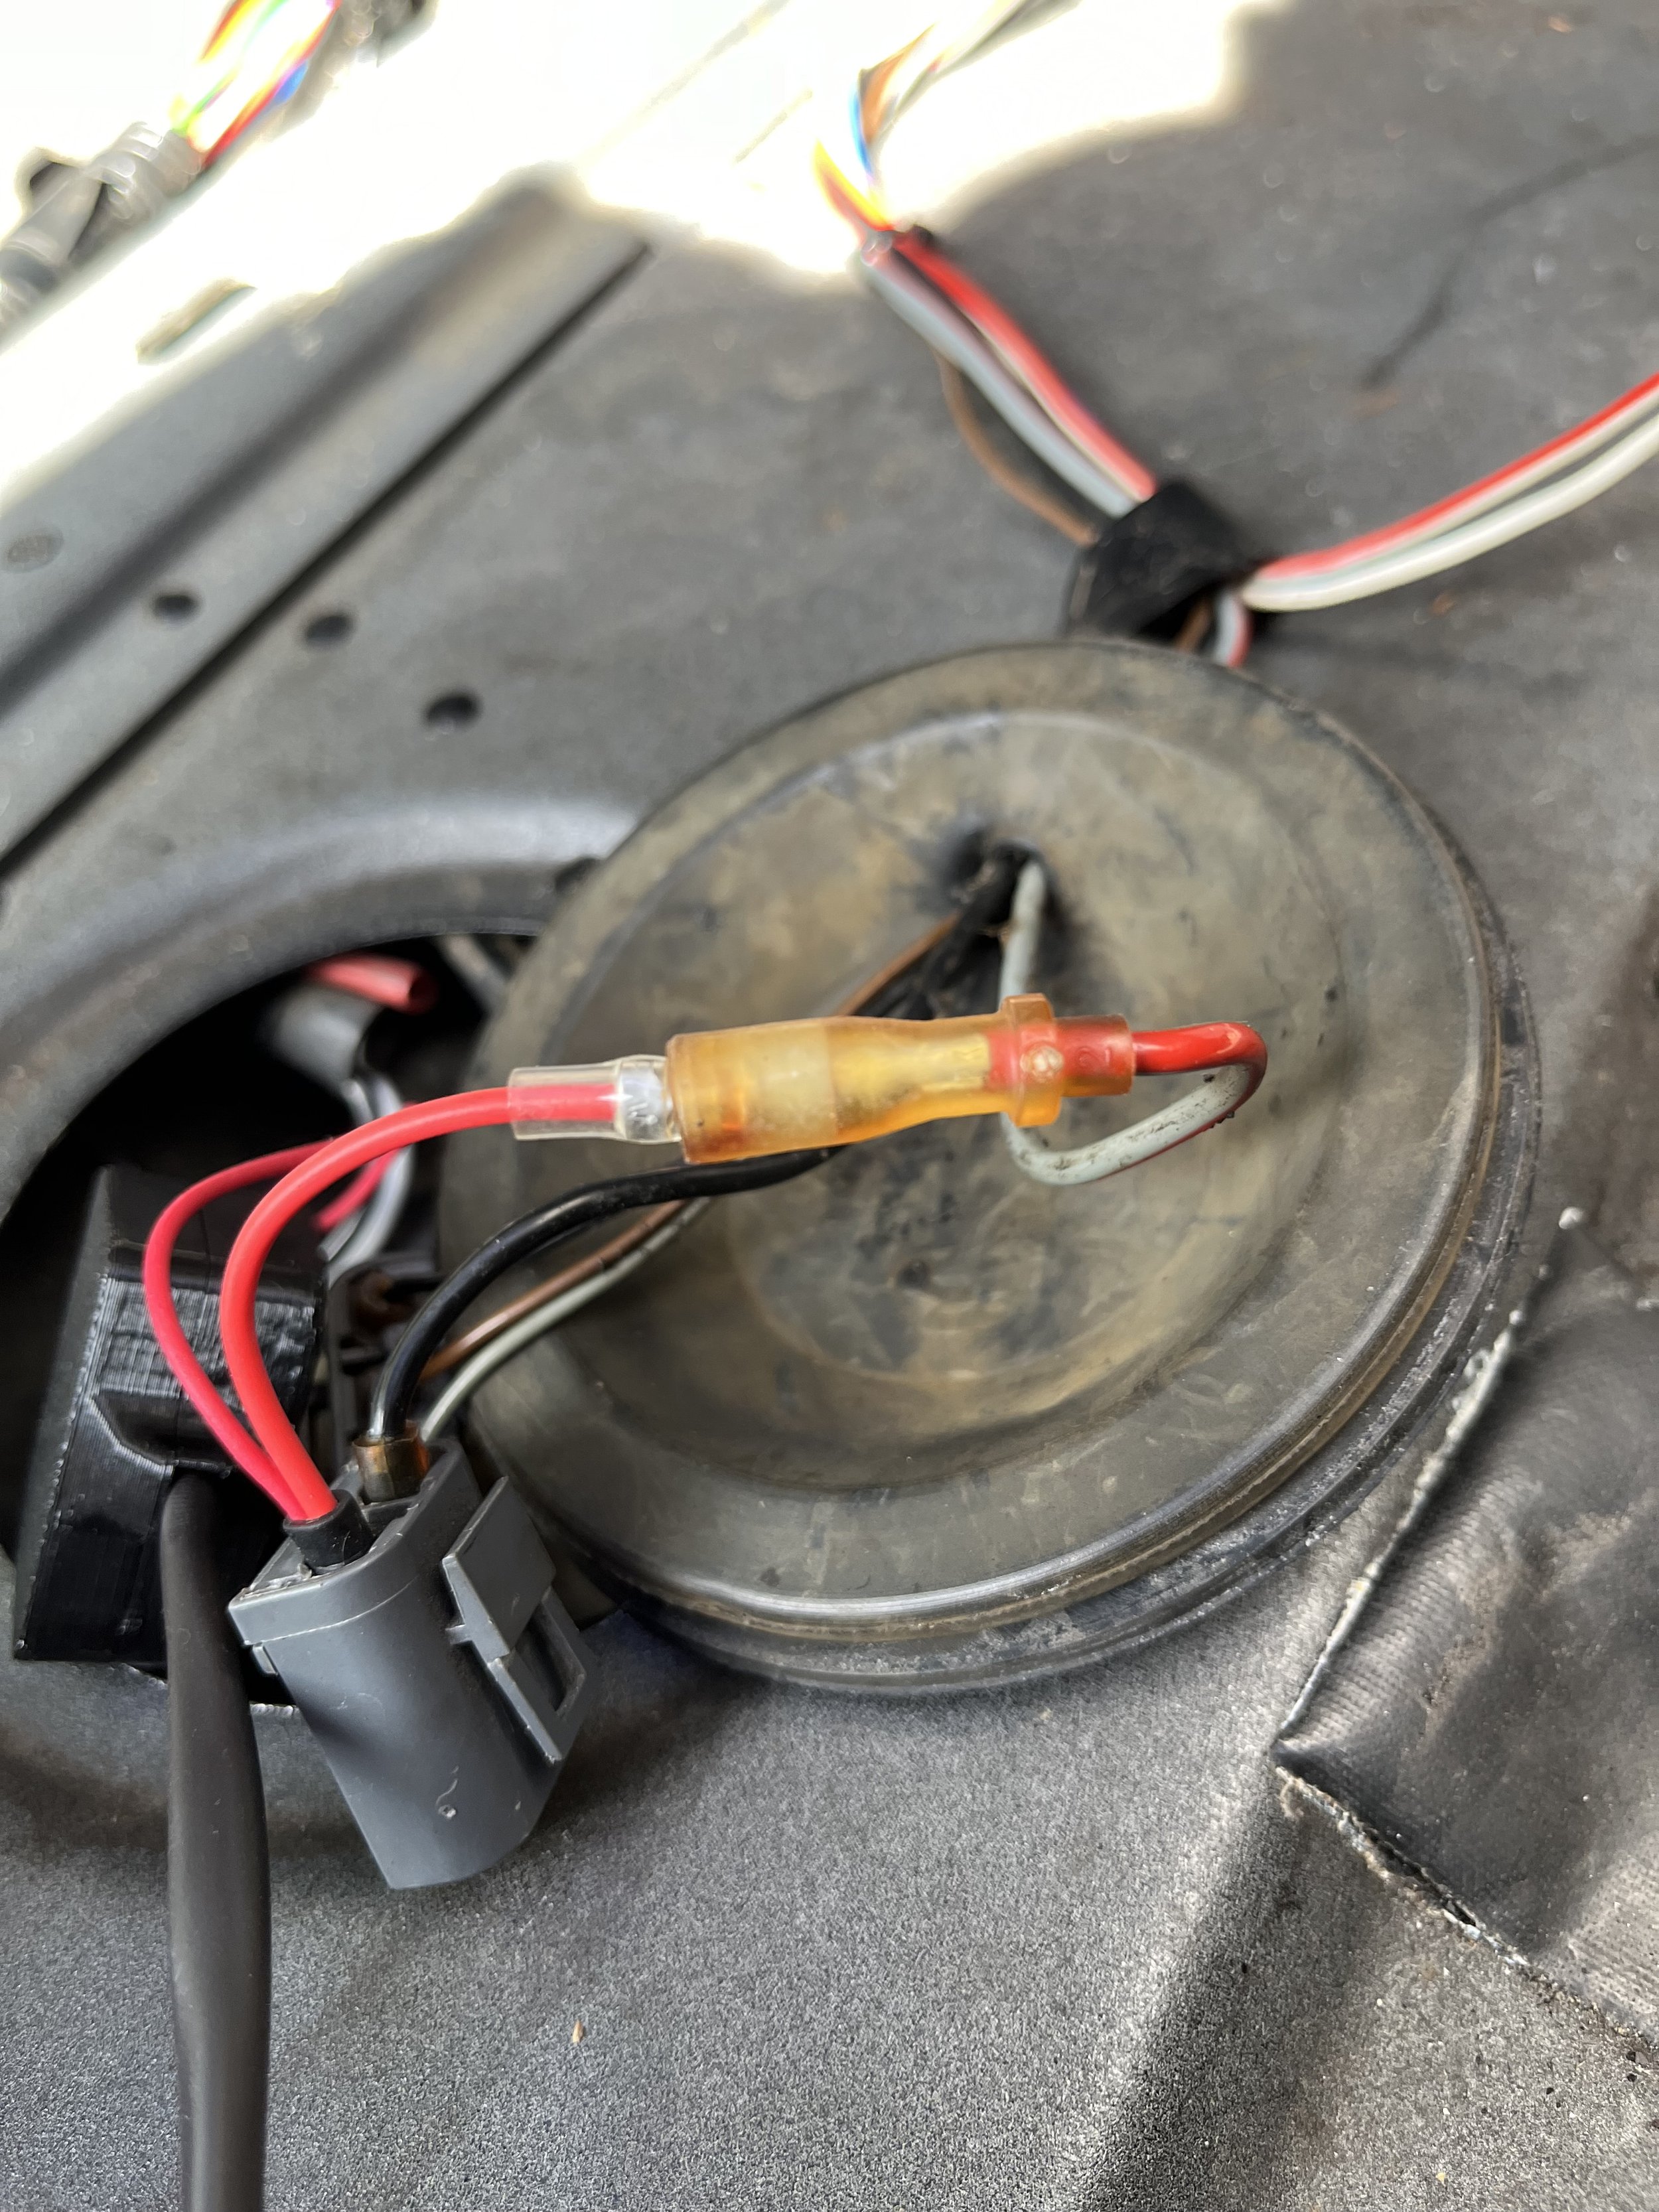
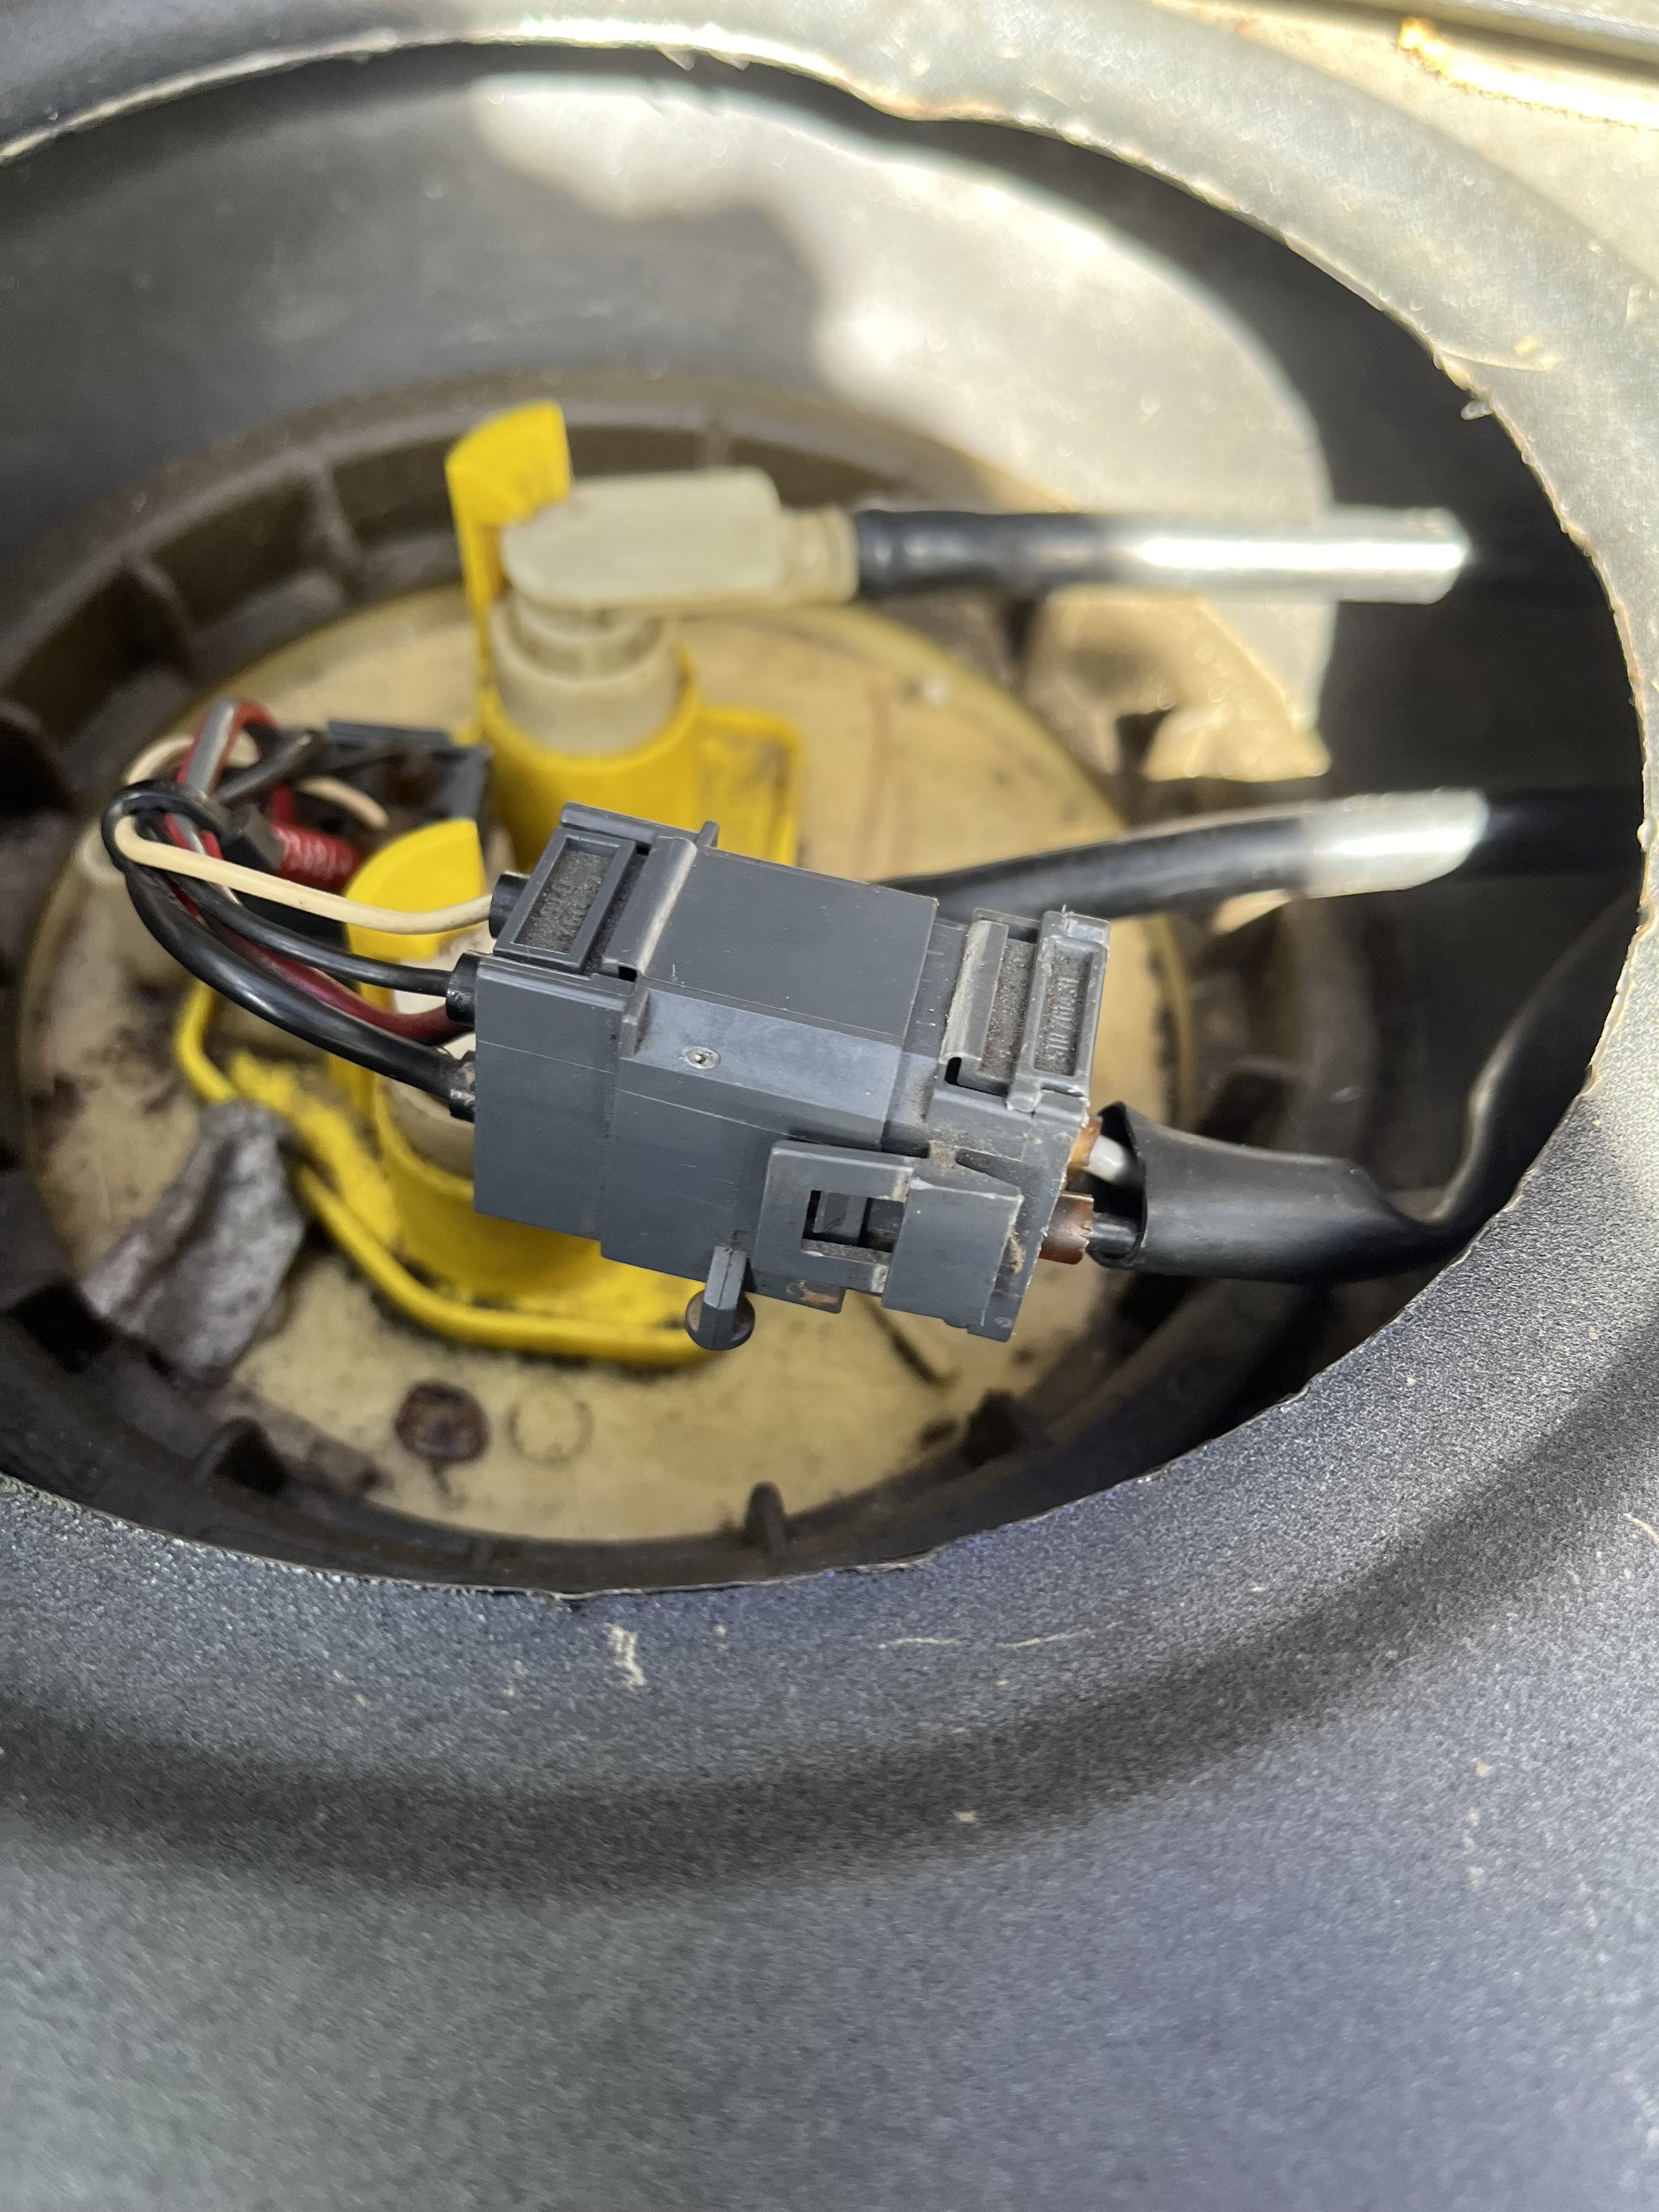
Next, you’re going to disconnect the 2-pin fuel pump power wire connector, still under the sender cover. Open up the connector back to be able to remove the Red/Gray wire from the connector housing. You can open up the connector using a small pick or screwdriver to open it up. The new sender unit will have a single red male and female connection. Put the male terminal into the now loose gray/red female terminal. Replace the female terminal on the MCS sender and close back up the connector housing. Reconnect the 2-pin connector plug.
Finally, feed the last two signal wires across the tank to the fuel pump side. Follow the path for the existing wires and fuel lines between the two covers under the trunk floor. Unplug that 4-pin connector coming off the pump wiring adapter, open the back of the connector and insert the small black and white wire terminals in. Close connector being sure silicone boots are fully seated. Reconnect the plug into the pump pigtail and installation is complete.
Before full reassembly, you’ll want to test the functionality of your fuel gauge and make sure you’ve got everything hooked up correctly (see below). When everything functions as expected, tuck all the parts away under the grommets, reinstall, and enjoy!
The unit is only powered when the fuel pump is running. This means for the gauge to work, the car has to be running since the fuel pump only supplies power when the engine is operating (not just ignition on). It also takes a few seconds to initialize and calibrate once the power is on, so the gauge can take up to 5 seconds after startup to show the current fuel level. The light remains completely functional and will illuminate when the tank is at 10% capacity approximately 1.8 US Gallons (~6.8L).